Non-Destructive Thread Inspection by Impression Molding
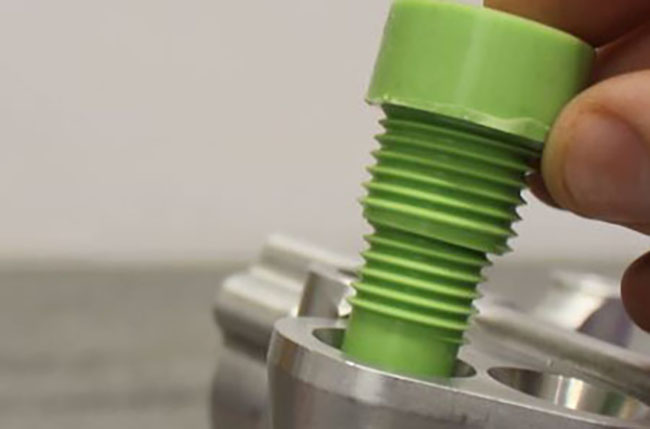
Threads are helical threads more commonly known as thread pitch. When a thread is inside a cylinder (female thread), it is a female thread. Conversely, a thread is an external thread (male thread).
Thread, bore and tap inspection is one of the common needs in the industry, there are a lot of parts that have this type of geometry and it is very important to ensure the conformity of their measurements. Yet this is far from easy to achieve, especially for custom threads.
In fact, for inspection machines, it is sometimes difficult to access certain corners of the part because of the geometry and dimensions of the pitch, or simply because of the hole entry diameter in the case of a female thread.
For machining where you want to certify the part dimensions, gauges are not always a good idea to ensure the dimensions of the machined part.
The different threads
Standard nets
There are several net standards in the world. They differ mainly in their geometry (flat apex, rounded apex, etc.) and pitch size (metric, imperial units, etc.)
Here are the most common nets in the industry:
- The SI (International System) metric thread – The valleys and crests are flat, the angle is 60° and the units (diameter and pitch) are in millimetres.
- The US thread (UNC and UNF) – The troughs and peaks are flat, the angle is 60°. The diameter is in inches and the pitch in number of threads per inch.
- Whitworth threading – It’s a British-made thread. Hollows and peaks are rounded, the angle is 55°. The diameter is in inches and the pitch is in number of threads per inch.
These three references are the most common in the industry and their control must be carried out rigorously in order to comply with the standards in force (ISO for example).
When you try to control a standard thread, you have many more choices than for its tap.
Outdoors, space does not force you to use the measuring tools as you wish and the part can even be positioned on a profile projector.
Using a gauge, you can thus easily see whether a part complies (or not) (with a relative visual inspection however).
Specific nets
Some sectors use their own nets to meet requirements specific to the industry or reference mounted assembly.
Although these nets have become standardized, it is often more complicated to perform quality control easily. There are many standards, but the problems encountered in this case are often identical.
At times, the necessary precision is very important to control not only the conformity of the thread, but also its wear. The inspection in the second case can quickly become difficult and expensive to carry out, as it requires disassembling the part and moving it.
Thread control, which solutions?
Thread gauges
In the case of standardised threads (and more generally standardised threads), control gauges exist, they are called thread gauges.
The instrument looks like a Swiss Army knife with several net testers. The tester is supposed to fit perfectly into the tenderloin if the tenderloin is good.
So the operator can visually check the conformity of his thread to the standard.
Digital Imaging Control
When you are looking for accurate data, gauges do not meet your needs, nor do they allow you to achieve traceability in your control.
Digital imaging is nowadays a widely used technique for checking various shapes, including threads (external threads).
Using these control devices, it is very easy to make very precise measurements on external threads, however, it is very difficult to make internal controls on threads for example. (and more generally on internal dimensions that are difficult to access.)
Indirect Thread Control
Less known, less popular, but very effective. This control technique aims to delocalize the control by using an intermediate (a fingerprint) of the area to be controlled.
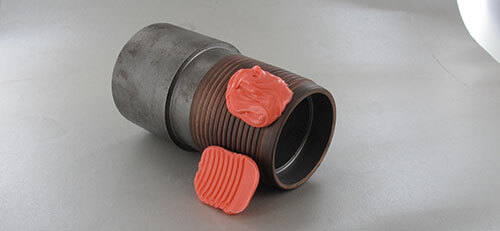
Checking an oil connection with the P35.
When you are looking to check the measurements of an internal thread, being able to check an intermediate impression can be very practical for, among other things:
Don’t waste time disassembling, move the part to the control machine and reassemble it.
To control an internal thread without having to destroy a part to make it measurable on a numerical vision machine.
To carry out systematic checks or more frequent wear checks thanks to the benefits of the first two points.
Indirect offshore control is a very economical, fast and easy to implement technique, it is very interesting for sectors where parts can be very expensive to produce.
Thread control by optical impression.
The impressions are excellent for making both internal and external thread impressions.
Indeed, even if it may seem easy to control a male net, it is sometimes more profitable (in time as well as from a financial point of view) to control the net anyway with a print.
For example, this is the case in sectors such as oil, gas and energy, which have threads on parts that are bulky or difficult to move.
At Plastiform, we use bi-component products that are originally liquid, pasty or malleable. At Plastiform, we use bi-component products that are originally liquid, pasty or malleable.
When the two components are brought into contact, the product hardens while remaining very elastic, it is thanks to this property that it is very easy to extract the impression from a female thread for example.
With the print thus extracted, you can easily carry out your measurements, but also and above all, keep a traceability of your control by keeping the print.
Which Plastiform for my thread control?
The choice of product is usually related to several factors:
The application you are looking to perform: dimensional control, surface finish control, roughness control, etc.
The more difficult it is to extract the print, the more flexible and resistant to elongation.
The initial consistency: should the product be rather liquid and flowable, rather pasty and hold or rather malleable and handleable directly with the hands. The initial consistency: should the product be rather liquid and flowable, rather pasty and hold or rather malleable and handleable directly with the hands.
Only a very liquid and penetrating product will be suitable for very fine pitch threads. The F20 has all the properties required for such an impression and is very easy to extract if your part also has an extraction constraint.
Print on female thread (inside)
For an internal thread, with a pitch > 0.25mm, two cases must be considered. The first one, you are looking for a total imprint of the thread. In this case, you will have to take into account the difficulty of extraction. As a general rule, you will have to use the F20.
Second, you can consider a partial thread impression. This strategy is rather interesting if you want to project the profile easily. Making a partial impression reduces the extraction constraint and thus makes it possible to use easier to handle impressions for control (especially if you want to cut a profile with the Double Blade Cutter for example). In this second case, the F50 will be the most suitable product.
View F20 in more detail View F50 in more detail
Print on male thread (outside)
Facing a thread on the outside, it is preferable to use a product that does not run. Pasty and malleable products are therefore good solutions. Depending on your preferences, you can choose between P35 and M70.
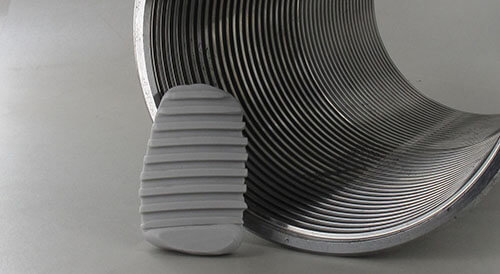
Thread impression of an oil pipe in M70
Both products can be cut with the Double Blade Cutter and are therefore easy to analyse via a digital vision machine or profile projector.
See P35 in more detail See M70 in more detail
Conclusion
Cavities are excellent for both internal and external thread inspection.
Although there are many alternatives to this technique, it remains the quickest, easiest and cheapest to implement.
It is particularly so in a context d’industrie 4.0 since it allows traceability of the measurements by the footprint in addition to the traceability of the measurements.
It is recommended to use products specially designed for thread inspection. For example, F20, F50, P35 or M70. These are products that are very easy to take and remove.
They are also very easy to use with modern measuring devices.

