Quality Control, Definition and Interests

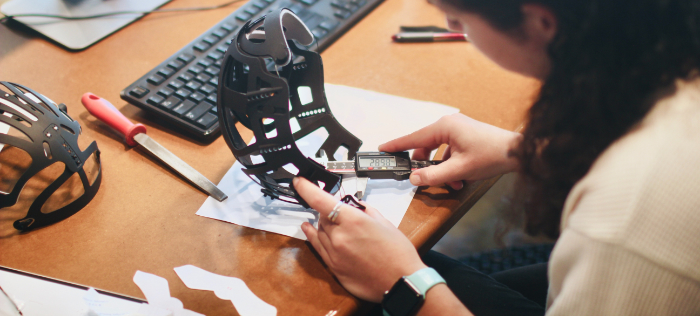
Quality control is a procedure implemented by companies to ensure the conformity of a product. Conformity is established on the basis of criteria developed by the company or by mutual agreement between a supplier and a customer. Quality control includes for example industrial metrology.
This voluntary approach enables the company to respond to product quality issues in an increasingly demanding market.
Ensuring product quality has become essential for companies, not only to meet customer requirements, but also sometimes for legal reasons.
Quality Control Definition
By definition, quality control is a procedure (or series of procedures) to ensure the quality of a manufactured product. From this perspective, the product must satisfy a defined set of quality criteria and customer requirements.
Beware, we often associate Quality Assurance with Quality Control, but the definitions are not exactly the same!
In contrast to the control procedure, which aims to identify potential non-conformities, quality assurance aims to prevent the manufacture of non-conforming products.
In French, it means that quality assurance intervenes during the manufacturing process of the product, where quality control intervenes once the product is finished. Both are often grouped under a single entity.
Compliance and non-compliance
Before going any further, let’s take a quick look at what compliance is all about!
Conformity is confirmed when the product passes all the quality tests successfully. The product is compliant and can move on to the next step. (assembly, marketing, etc.)
When products are not in conformity, it is necessary to perform one (or several!) action(s) in order to pass the audit. A non-conformity is the non-compliance with a requirement. This mainly involves the detection of the root cause, and then we look at the non-conformity: is the product retouchable or is it to be thrown away?
Control Missions
The objective of quality control is to detect non-conformities at the right time and to identify the causes of this analysis.
Detecting problems is good news for the company, it means that you are able to identify and correct problems when they occur. There are many sources of non-compliance and it would be worrisome if you never detect problems.
Let’s distinguish between two types of controls for the rest of this article.
Control on receipt
You must ensure that products received from a supplier pass the required audits.
In this case, you are not in charge of manufacturing the product, so you must verify that it meets your requirements.
Usually, the audit is performed before the product is put into storage.
Control at the end of production
When you are the manufacturer of the product, you must also test your product.
Indeed, even though you may be in control of production, a malfunction could creep into your process and you owe it to your customers to certify the conformity of your product.
In this case, quality control allows you to identify malfunctions and to resolve them quickly and reactively.
How to carry out a quality control
There are different ways of carrying out a control. First of all, let’s distinguish the methods. There are two of them:
- 100% Inspections, or systematic control. In this methodology, the controller seeks to control all the parts of the batch.
- Sampling Controls. Contrary to the 100% control, only a part of the lot is controlled, a representative sample.
Both methods have their limitations, but it is important to distinguish between the broad outlines. If you control each of the parts, you will be limited in several points :
- The cost will be much more important, since you perform more controls.
- You will not be able to carry out destructive testing and will be limited to non-destructive testing techniques. (Including Plastiform! Why don’t you take a look at it? )
- By testing at a higher frequency, you increase the risk of human error.
Conversely, testing by sampling will limit you in terms of performance, you don’t test everything, so you are likely to miss a flaw.
This is quite rare and that’s why this methodology is widely used.
Reacting to non-compliance
The detection of a manufacturing defect is a crisis situation.
Indeed, if you find a problem, you are facing several problems. First, you will have to identify the problem (which is not always obvious), then you will have to repair it, and then run a battery of tests again.
During this time, you can no longer produce. Not only will you be unable to produce, but you will have to fix what has already been produced, or worse, lose the products.
Therefore, it is essential to be reactive and to be able to react quickly during all the steps of quality control, namely :
- Carry out non-timing checks, to detect defects as early as possible (Attention! Fast does not mean sloppy!).
- To be reactive on the detection of the origin. If you check your product at the very end of the chain, you will, for example, have many more potential sources of problems than if you check at every step.
- You will also have to be reactive on the re-compliance of the production line, which means that you have a clear and established procedure.
Types of inspections
Being reactive also means selecting the right tools.
When it comes to product quality control, you have three options:
- Destroy the part to carry out the control by performing a destructive test. This is an expensive and sometimes very time-consuming option, but it saves you if you don’t have a solution.
- Control without destroying via non-destructive testing solutions. Depending on the solution, it is more or less time consuming, but it is generally more economical than destroying the part. (Especially if you use Plastiform )
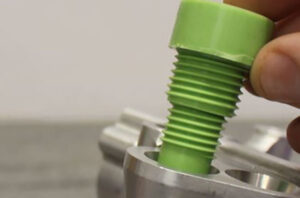
- Indirect relocated control. This is a specific field of non-destructive testing. The control is no longer carried out on the part, but on its imprint, and the imprint serves as a witness of the measurement. (and thus facilitates the traceability of the control).

Example of a delocalized indirect control
It is important to determine your control processes in advance with careful thought to optimize this process as much as possible.
It is also important to set up a permanent watch to continuously improve your methods.
Conclusion
Nowadays, it is essential to set up a quality control approach in companies. Whether it is by internal concern to propose qualitative products, or by legislative or contractual obligation, quality control is a reality that you will have to face.
We distinguish two types of quality control, the control at reception, and the control in production. In both cases, the objective is to detect anomalies on the products.
There are different methodologies to perform quality control. You can first perform a 100% inspection, by testing each of the parts in a batch, or you can opt for a sampling inspection, by selecting only a portion of the parts in the batch.
In both cases, it is important to be efficient in detecting and dealing with non-conformities so as not to penalize the company’s profitability.
Failure to quickly detect the origin of a problem, or even worse, the problem itself, could lead to a stoppage of the line or the production of parts that cannot be traced, which is a problem!
Plastiform is an innovative solution for non-destructive testing that allows for fast and highly efficient dimensional or surface inspection. It is a solution that takes just a few minutes and whose imprint remains a witness, so you can claim it from your supplier to validate the control on receipt.


